Toz 35 Modifications

If you wish to make a donation to this forum's operation , it would be greatly appreciated.
https://www.paypal.com/paypalme/targettalk?yours=true

Moderators: pilkguns, m1963, David Levene, Spencer, Richard H

Forum rules
If you wish to make a donation to this forum's operation , it would be greatly appreciated.
https://www.paypal.com/paypalme/targettalk?yours=true
User avatar
rem.44
Posts: 30
Joined: Tue Dec 27, 2011 3:25 pm
Location: Nantes, FRANCE
Contact:

Re: Toz 35 Modifications

Post by rem.44 »

Thanks, it's kind of you !
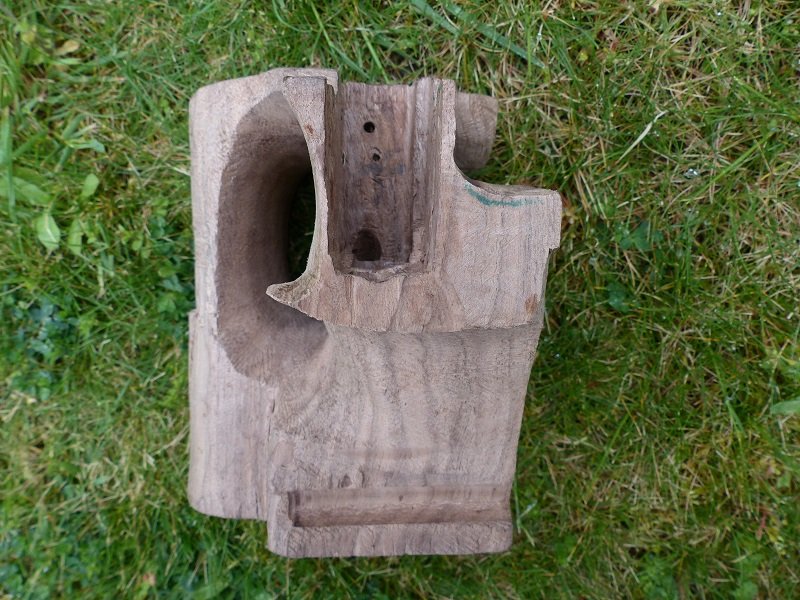
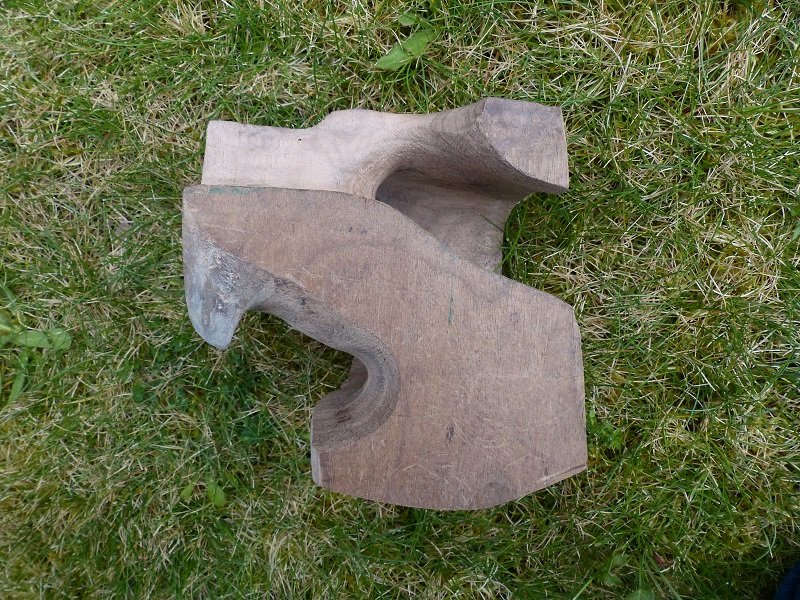
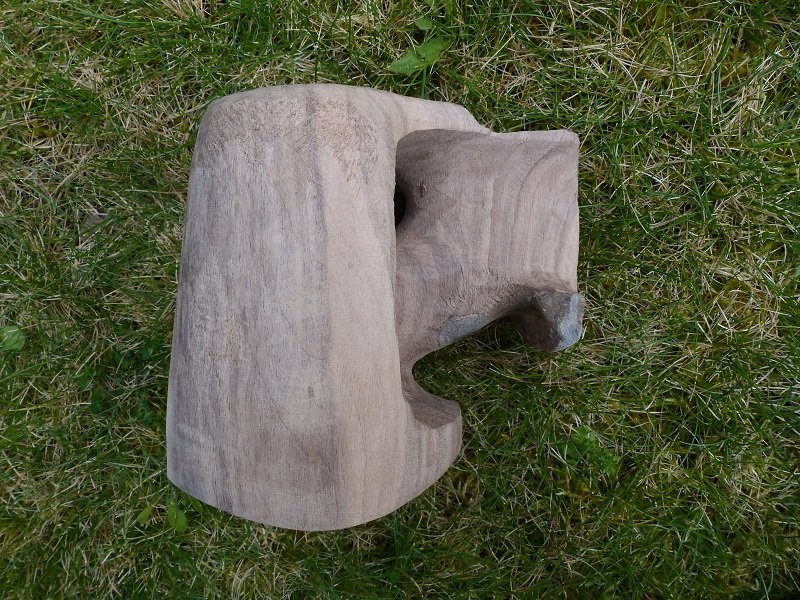
Here are the next steps : work with wood chisel and gouge, to seat the reciever.

Merci, c'est sympa.
La suite : travail du bloc au ciseau à bois, pour continuer la découpe, pour encastrer la carcasse.

Vu de face / face view :

Image

Vu du dessus / upper view :

Image

Stay safe and healthy !
User avatar
Mr_Ree
Posts: 18
Joined: Sat Aug 08, 2015 6:31 pm
Location: Phoenix, AZ

Re: Toz 35 Modifications

Post by Mr_Ree »

I await with anticipation the next step.
User avatar
rem.44
Posts: 30
Joined: Tue Dec 27, 2011 3:25 pm
Location: Nantes, FRANCE
Contact:

Re: Toz 35 Modifications

Post by rem.44 »

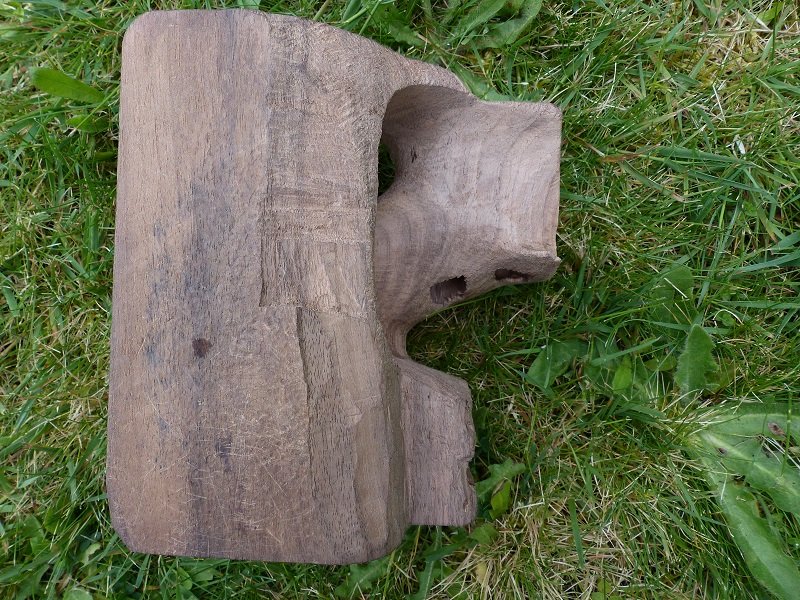
Sawed the front part of the block, to allow the correct seating of the reciever at the level of the trigger guard, and drilled a hole to allow the attachment of the gun to the grip with a long screw.

Sciage de la face avant, pour caler l'arme au niveau du pontet, et perçage du trou pour la fixation de la crosse grâce à une vis.

Image

Image

Image

Take care of yourselves !
User avatar
rem.44
Posts: 30
Joined: Tue Dec 27, 2011 3:25 pm
Location: Nantes, FRANCE
Contact:

Re: Toz 35 Modifications

Post by rem.44 »

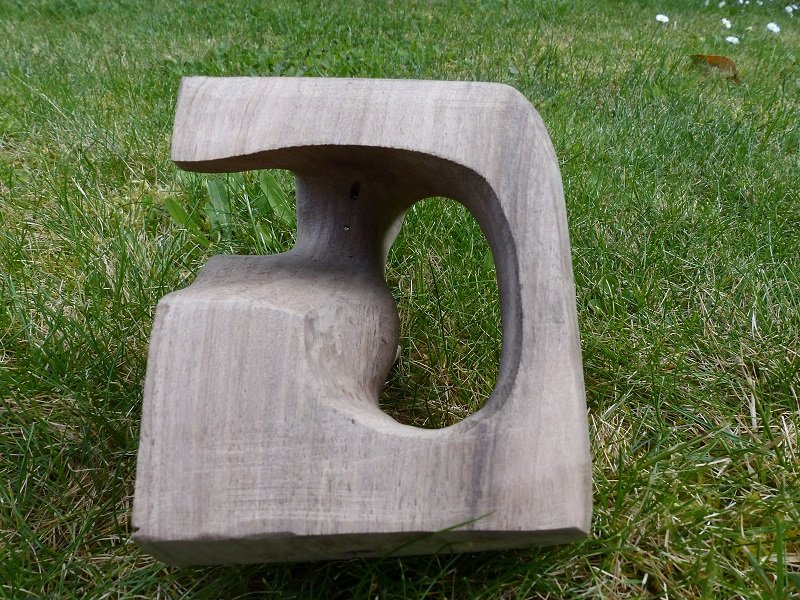
Next steps : after the finishing of the reciever housing, I worked on the upper of the block, to align it with the bolt.
And then, on the left side of the block, I carved the thumb rest with a wood gouge, and finished with a rasp.

Image

Image

To be folowed ... Stay healthy !
User avatar
Mr_Ree
Posts: 18
Joined: Sat Aug 08, 2015 6:31 pm
Location: Phoenix, AZ

Re: Toz 35 Modifications

Post by Mr_Ree »

Great! Any chance you could add a picture of the actual tools you are using?
User avatar
rem.44
Posts: 30
Joined: Tue Dec 27, 2011 3:25 pm
Location: Nantes, FRANCE
Contact:

Re: Toz 35 Modifications

Post by rem.44 »

Nothing special about tools : a budget press drill, that allows to drill "straight", in particular when you beginn the grip, when the block still has straight faces. It's easy to set the height of the plate, to drill at rhe right depth in the wood. You can even use it as a router/milling machine, when you make a grip in two parts.
Spade drills for wood : you remove material by drilling, and you finish with gouges and chisels.
Gouges and chisels : I had a few, but not very valuable, then I forged two HSS drill bits and a 12 mm wood spade drill, quenched them, ground and honed them to have more specific tools. I like working steel, it's rather funny !

Image

A caliper, a ruler, a square, a kind of variable protactor.
And of course, a plenty of rasps, files, some "modern", some very ancient, from an old grand-father, a wood saw, and sanding paper.

Image

Image


But the most important is my previous grip, which is almost perfect for my hand, with a natural alignement of the front sight in the notch of the rear sight, even when I raise my arm with the eyes closed !
User avatar
Mr_Ree
Posts: 18
Joined: Sat Aug 08, 2015 6:31 pm
Location: Phoenix, AZ

Re: Toz 35 Modifications

Post by Mr_Ree »

Thanks!
User avatar
rem.44
Posts: 30
Joined: Tue Dec 27, 2011 3:25 pm
Location: Nantes, FRANCE
Contact:

Re: Toz 35 Modifications

Post by rem.44 »

Back to the grip ...

Quelques mesures, histoire de ne pas percer où il faut pas, avant d'attaquer la sculpture de l'empreinte de la crosse.
Taking measures, to see exactly where to drill, before carving the palm print of the grip.

Image

Ensuite perçage horizontal, histoire de "préparer" le passage de la main :
Then, an horizontal drilling, to prepare the thumb/trigger finger crotch.

Image

Et ensuite on attaque par l'arrière, en continuant de creuser;
And we keep on drilling and carving the rear of the grip:

Image
User avatar
Mr_Ree
Posts: 18
Joined: Sat Aug 08, 2015 6:31 pm
Location: Phoenix, AZ

Re: Toz 35 Modifications

Post by Mr_Ree »

What side of the block is displayed in the last picture? Is the carve-out in a left to right position?
User avatar
rem.44
Posts: 30
Joined: Tue Dec 27, 2011 3:25 pm
Location: Nantes, FRANCE
Contact:

Re: Toz 35 Modifications

Post by rem.44 »

This is the rear side, where my hand will enter to "grip" it.
At the bottom of the carved part, you can see the beguinning of the hole to prepare my finger trigger placement.
And below, at the base of the block, the hole of the attachment screw.
Gwhite
Posts: 3434
Joined: Sat Sep 04, 2004 6:04 pm
Location: Massachusetts

Re: Toz 35 Modifications

Post by Gwhite »

I went through this process many years ago. One problem I had was that getting the part that wraps around the back of the hand just right is tricky. If you've removed enough wood to get your hand in all the way, and you discovered the inner part is too fat, by the time you've got that right, the outer part will be too loose.

My solution was to find a cute blonde at work who had slightly smaller hands than mine. She could get her hand in when it was still too tight for mine, and tell me where it needed more wood removed. Her father was a shooter, and she was happy to help.
User avatar
Mr_Ree
Posts: 18
Joined: Sat Aug 08, 2015 6:31 pm
Location: Phoenix, AZ

Re: Toz 35 Modifications

Post by Mr_Ree »

Innovative approach. Kudos.
User avatar
rem.44
Posts: 30
Joined: Tue Dec 27, 2011 3:25 pm
Location: Nantes, FRANCE
Contact:

Re: Toz 35 Modifications

Post by rem.44 »

A good idea, indeed ! I should have asked my daughter for some help !

Using my previous grip as a model, made some tracings to help drilling in the right places, with the right angles to prepare the trigger finger channel :

Image

And finally managed to drill from the front to the rear, praying to be in the good direction !

Image

Kept on drilling the right side of the grip, to prepare the trigger finger channel, which allows to keep on carving the inner palm print of the grip :

Front view:

Image

Image

And rear view :

Image

Keep on staying safe at home : take care of yourselves !
User avatar
Mr_Ree
Posts: 18
Joined: Sat Aug 08, 2015 6:31 pm
Location: Phoenix, AZ

Re: Toz 35 Modifications

Post by Mr_Ree »

Thank you for the photos; particularly the one with all of the drill holes. I had not understood previously an earlier comment about using your drill. Now I understand how you are able "hog" out so much material at different angles.
SeanM
Posts: 71
Joined: Mon May 09, 2011 8:49 am
Location: California

Re: Toz 35 Modifications

Post by SeanM »

rem.44 wrote: Wed May 06, 2020 3:00 pm Hello Guys !
Thank you for bumping this thread and giving me the chance to see the pictures of how you did your sidecocker. It's interesting to compare/contrast with mine that I just recently finished:

Image

I did the same two threaded holes into the top of the cocking lever assembly that you did, with the same little spacer of material between that and the new lever. I chose to keep mine much lower on the gun (lower than the top of the barrel), which required me to modify the wood on the fore-end. Extra work, but I think it was worth it. I chamfered the holes on the new lever and threw in some flat head screws to keep it flush.

The detent I did in a different location and I think this is where I really wish I would have seen your post from four years ago before I started: I did a single position detent that does not hold itself open when loading because gravity wants to pull the lever back down. It's not a huge deal, but it means I have to hold the lever up with my pinky finger while loading the next shot with my thumb and pointer.

I also took the lazy way out with the grip:

Image

Starting from scratch was too ambitious for me, so I drilled some holes through the original two-piece grip (plus palm shelf), doweled the pieces together, and filled the void with some two-part fiberglass epoxy/resin I had sitting around the shop. Once that was done I took it to the belt sander and slimmed it down a bit.

Image

And of course, my favorite part of the whole project: What to do with the old cut-off bit of the cocking lever? Since I spent the last 7 years of my life with it I couldn't just throw it away, so I decided it made for quite a handsome keychain.

Image

Good luck with your from-scratch grip, can't wait to see how it turns out!

Image
User avatar
rem.44
Posts: 30
Joined: Tue Dec 27, 2011 3:25 pm
Location: Nantes, FRANCE
Contact:

Re: Toz 35 Modifications

Post by rem.44 »

Hi Sean !
Congratulations, your TOZ is really wonderful !
The grip is very nicely shaped, and the pistol seems very well balanced.
What is its weight now ?

But your TOZ seems rather strange to me ...
It's obviously a TOZ 35, not M, but one detail astonishes me : the "window" cut in the reciever is round, not square. Bizarre ...

And of course, your muzzle brake looks great : it's really something i'd like testing one of these days.

About the cut-off bit of the cocking lever, I found it back, and have a little idea to recycle it ...
But it will wait the end of the grip-work !

Grip-work : suite ...
Most of the work was made at these steps only with a rasp, and with my previous grip to serve as a model.

Image

Image

Image

Image

Image

Image

Image
SeanM
Posts: 71
Joined: Mon May 09, 2011 8:49 am
Location: California

Re: Toz 35 Modifications

Post by SeanM »

rem.44 wrote: Tue May 12, 2020 3:33 pm Hi Sean !
Congratulations, your TOZ is really wonderful !
The grip is very nicely shaped, and the pistol seems very well balanced.
What is its weight now ?
The overall package I'm shooting right now is 1170 grams. Of that 85g is the compensator and 221g is the grip/hardware.

I'd be interested in knowing how much your old grip/hardware weighs, there's a lot of extra wood on there and THAT BOLT! You could mount a big screen TV to a wall with that thing!
User avatar
rem.44
Posts: 30
Joined: Tue Dec 27, 2011 3:25 pm
Location: Nantes, FRANCE
Contact:

Re: Toz 35 Modifications

Post by rem.44 »

Yes, this was the first screw, And I was afraid it was not tough enough ....
I have changed it, and I have thinned the arch, to loose weight .
The pistol "naked" weighs 830 grammes. And the grip, with its screw, weighs 290.
So, the overall package weighs 1120 grammes: not so bad !
Image

But the next one will be lighter ...

A little problem occurred while carving the finger prints beneath the trigger guard ...
I have made two holes to allow the operation correctly working without touching the wood.
Too deep, obviously ...

Image

Image

I had to fix that with a kind of grip putty : we call that "syntobois", and believe me, I've used tons of that !!!

Image

Image

Image

Image


Next steps : cutting the base of the grip, to make it loose somme weight, and make it look like a real grip !
User avatar
Mr_Ree
Posts: 18
Joined: Sat Aug 08, 2015 6:31 pm
Location: Phoenix, AZ

Re: Toz 35 Modifications

Post by Mr_Ree »

Amazing what it suddenly has become.
User avatar
rem.44
Posts: 30
Joined: Tue Dec 27, 2011 3:25 pm
Location: Nantes, FRANCE
Contact:

Re: Toz 35 Modifications

Post by rem.44 »

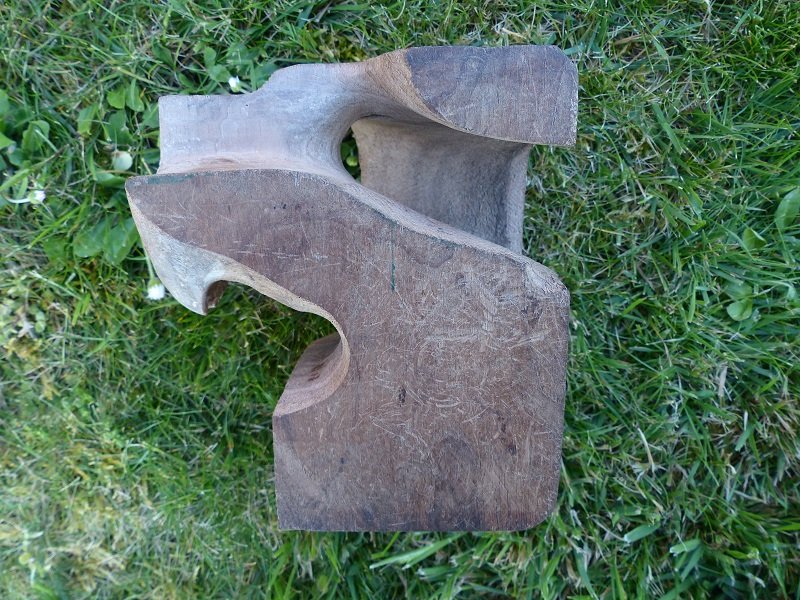
The following is even more impressive : now, it really looks like an actual grip !
I cut parts of the base, to loose more weight, rounded the angles of the rear face, and re-shaped the arch :

Image

Image

Image

Image

Image

Image

Image

Image
Post Reply